How to Install GIT ?
In this blog post we are going see the installation steps for git on windows O.S
Following are the steps required to install the GIT on Windows O.S.
1) Open the following link in any browser https://git-scm.com/download/win
Download will start automatically , if it does not start click on "click here to download manually" hyperlink.
2) Once Download is complete click on .exe file.
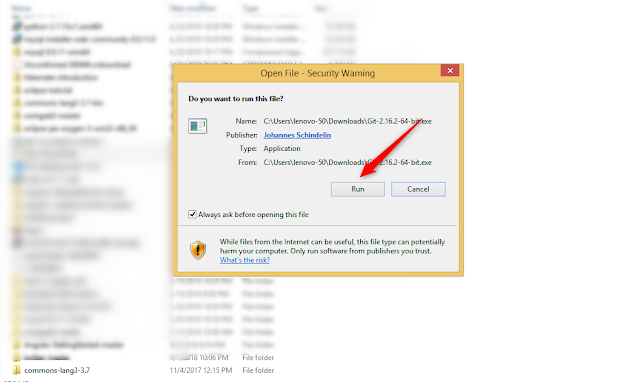
3) Click on Run if the security warning window pops up.
4) Follow through the default installation process until you get to “Choosing the default editor used by Git”. The default “Use Vim” may be too complex to use, if you are not familiar with Vim. Choose Nano or Notepad++ or visualstudiocode which is easier to use.
5) Choose “Use Git from the Windows Command Prompt”.
6) In "Choosing HTTPS transport backend" window leave the default option selected, then click on next.
7) In "Configuring the line ending conversions leave the default option selected,then click on next.
8) Choose “Use Windows’ default console window.
9) Click on “Install”.
10) Click on “Finish”
This is how we can install the GIT on windows. In next post we will see how we can use GIT Command Prompt to execute git commands.
Please leave a comment below if you have any questions.
I am happy to assist you.thanks..


Thank you for your post. This is excellent information. It is amazing and wonderful to visit your site.
ReplyDeleteDot Net Classes in Chennai
Selenium Testing Training in Chennai | Selenium Coaching Institute in Chennai
Best Software Testing Training Institute in Chennai | Testing Courses in Chennai
Java Training Institute in Chennai | Core Java Training in Chennai | Java Course and Certification
PHP Course in Chennai